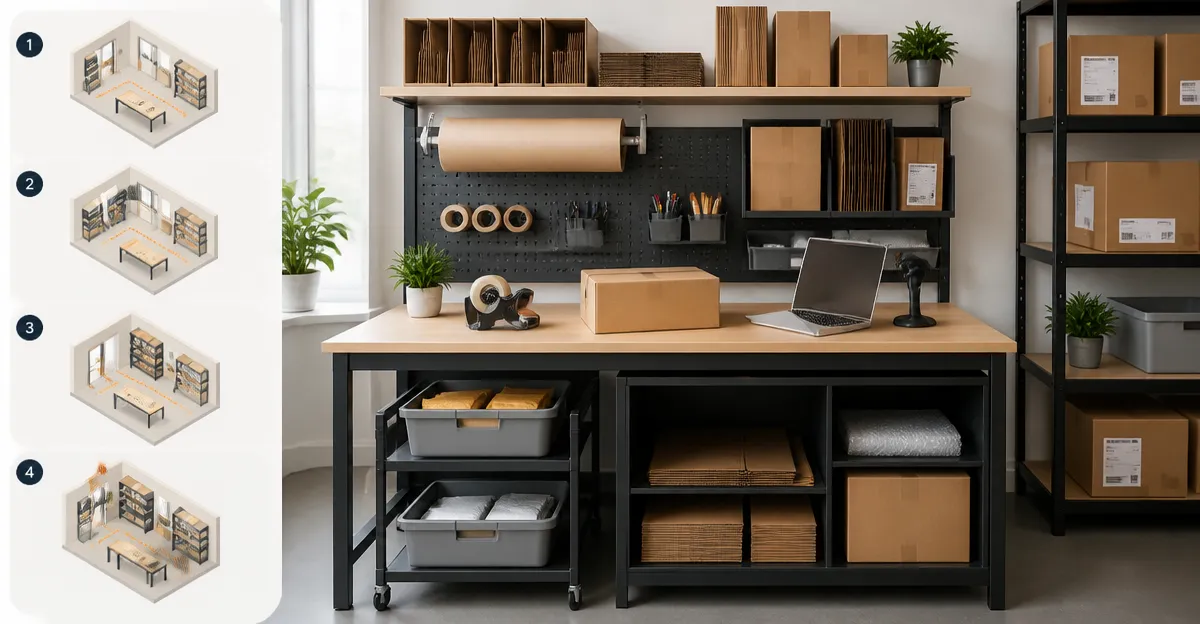
How to Design a Packing Station Layout for Small Businesses: Space‑Saving, Efficient Ideas & Step‑by‑Step Setup
Introduction
Small businesses often operate in limited square footage, yet they must maintain a smooth order‑fulfillment flow. This guide explains how to design a packing station that maximizes every inch while preserving ergonomics and speed. Readers will learn to assess space, select essential tools, and arrange equipment for optimal workflow. By the end of the article, one will be able to implement a functional packing area without costly renovations.
What You’ll Need
- Measuring tape or laser measurer
- Floor‑planning paper or digital layout software
- Label printer and barcode scanner
- Storage bins, shelving units, and a sturdy work surface
- Lighting fixtures for adequate illumination
- Cleaning supplies to keep the area tidy
- FDW Adjustable Folding Table – a compact, height‑adjustable work surface
Step 1: Measure and Map Your Space
The first step is to obtain accurate dimensions of the area designated for packing. Use a measuring tape or laser measurer to record length, width, and ceiling height, noting any obstructions such as columns or doorways. Transfer these measurements onto graph paper or a digital tool, drawing walls to scale (one square equals one foot, for example). This visual map will serve as the canvas for placing equipment and will reveal potential bottlenecks before any physical changes are made.
Step 2: Define the Workflow Zones
Effective packing stations separate tasks into distinct zones: receiving, staging, packing, and shipping. Position the receiving zone near the entry point to minimize travel distance for incoming inventory. The staging area should sit centrally, allowing easy access to both storage and packing surfaces. Finally, locate the shipping zone close to the exit door or loading dock. By arranging zones in a logical sequence, one reduces unnecessary steps and improves overall throughput.
Step 3: Choose a Versatile Work Surface
Space constraints often dictate the need for a table that can fold away when not in use. The FDW Adjustable Folding Table provides a 30‑inch surface that supports up to 250 lb, making it suitable for laptops, packaging supplies, and small equipment. Its three‑height settings (21", 26", 29") enable one to switch between seated and standing positions, promoting ergonomics during long packing sessions. Because it requires no assembly, the table can be repositioned quickly to accommodate seasonal workflow changes.
Step 4: Install Adjustable Shelving and Bins
Vertical storage maximizes floor space. Select metal or heavy‑duty plastic shelving that can bear the weight of bulk packaging materials such as boxes, bubble wrap, and tape. Use clear, stackable bins for small items like labels, fillers, and accessories; label each bin to avoid rummaging. Position the most frequently used supplies at eye level to reduce bending and reaching, which can lead to fatigue over time.
Step 5: Optimize Lighting and Power Access
Good illumination reduces errors when reading labels or scanning barcodes. Install LED strip lights or adjustable task lamps above the packing surface; LEDs consume little power and produce minimal heat. Ensure that power outlets are conveniently located for the label printer, barcode scanner, and any charging stations. If the workspace lacks sufficient outlets, consider a surge‑protected power strip mounted on the wall for safety.
Step 6: Arrange the Packing Tools
Place the label printer and barcode scanner within arm’s reach of the work surface, preferably on a small side table or a dedicated printer stand. Keep a roll of packing tape, a box cutter, and a pair of scissors in a wall‑mounted holder to keep the tabletop clutter‑free. A small waste bin should sit at the corner of the table for discarded packaging material, encouraging a tidy environment.
Step 7: Implement an Efficient Layout Using the Table
Deploy the FDW Adjustable Folding Table as the central packing station. Start with the table set at the middle height (26") for a comfortable seated position during initial setup. When order volume spikes, raise the table to 29" to allow standing work, which can increase speed and reduce fatigue. After peak periods, lower the table and fold it flat against a wall to reclaim floor space for other activities.
Step 8: Test the Flow and Make Adjustments
Run a simulated order‑fulfillment cycle to identify any friction points. Observe how long it takes to move items from receiving to shipping, noting any back‑tracking or congestion. Adjust the placement of bins, shelving, or the table height based on these observations. Small tweaks—such as moving a frequently used box cutter one foot closer—can yield measurable time savings.
Tips & Pro Tips
- Use color‑coded bins to differentiate between fragile, heavy, and standard items; this reduces packing errors.
- Implement a ‘one‑touch’ principle—handle each item only once from receipt to shipment to avoid duplication of effort.
- Install a magnetic strip on the side of the table for quick access to metal tools such as box cutters.
- Schedule regular ergonomics checks—ensure that the table height and chair height remain aligned with the operator’s posture.
- Keep a spare roll of tape on a wall‑mounted holder to prevent downtime when the primary roll runs out.
Troubleshooting
Problem: The table wobbles on uneven flooring.
Solution: Place rubber anti‑slip pads under each leg of the FDW Adjustable Folding Table; this stabilizes the surface without damaging the floor.
Problem: Labels do not adhere properly to boxes.
Solution: Ensure the work surface is clean and free of dust; a quick wipe with a damp cloth before printing improves adhesion.
Conclusion
Designing a packing station for a small business requires careful measurement, thoughtful zoning, and the right tools. By following the eight steps outlined above, one can create a compact, ergonomic, and highly efficient workspace. The recommended FDW Adjustable Folding Table exemplifies a versatile solution that saves space while offering height flexibility. Implement the tips and troubleshooting advice to maintain smooth operations, and your packing station will support growth without demanding additional square footage.
Products Mentioned in This Guide
Frequently Asked Questions
How much space is needed for an efficient packing station?
Most small businesses can operate in 50‑100 sq ft, but ensure at least 3‑4 feet of clearance around the work surface for movement.
What essential equipment should a small‑business packing station include?
An adjustable work table, label printer, barcode scanner, shelving or storage bins, and adequate lighting are the core items.
How can I maximize limited space with vertical storage?
Install wall‑mounted shelves, pegboards, and stackable bins to keep supplies off the floor while keeping them within arm’s reach.
What ergonomic factors should I consider in the layout?
Set the work surface at waist height, keep frequently used tools within a 2‑foot radius, and use anti‑fatigue mats to reduce strain.
How do I design a workflow that reduces order‑fulfillment errors?
Arrange stations in the order pick‑pack‑label‑seal, use clear labeling, and employ barcode scanners to verify each step.