Introduction
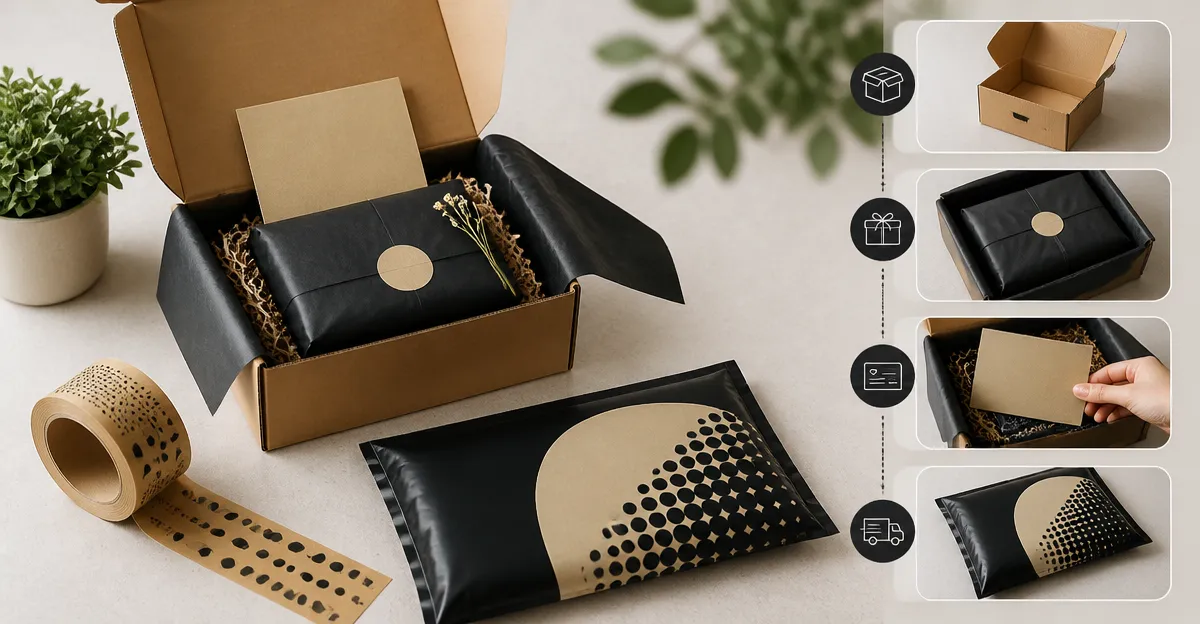
In today’s competitive e‑commerce landscape, the moment a customer opens a package can define their perception of a brand. A memorable unboxing experience creates emotional resonance, encourages social sharing, and drives repeat purchases. This guide explains how to design such an experience without exceeding a modest budget, using practical techniques and affordable tools. Readers will learn to select appropriate packaging, apply branded sealing elements, and add personalized touches that elevate perceived value.
While many businesses invest heavily in custom boxes and premium printing, a thoughtful combination of poly mailers, custom tape, and simple inserts can achieve comparable impact. The strategies presented rely on readily available Amazon products, each chosen for its cost‑effectiveness, durability, and positive customer feedback. By following the steps below, entrepreneurs can transform ordinary shipments into brand‑building moments.
What You’ll Need
- JinRuiKJ Black Poly Mailers
- COACO Custom Shipping Tape
- Fuxury White Poly Mailers
- Frosted Zipper Clothing Bags
- Spakon Pink Shipping Boxes
Step 1: Define Your Brand Story and Packaging Concept
The first step is to articulate the narrative that will guide every packaging decision. Identify core brand values, color palette, and the emotions you wish to evoke when a customer opens the parcel. A clear concept ensures consistency across all visual elements, from the mailer color to the seal design. Document the story in a brief brief that can be shared with any supplier or designer involved in the process.
When the concept is established, allocate a modest portion of the budget to elements that will be most visible to the customer. Research shows that the outer envelope accounts for approximately 70% of the first impression, making it a critical touchpoint. Choose a mailer that aligns with the brand palette while offering functional benefits such as waterproofing and tamper resistance.
Step 2: Select the Ideal Poly Mailer
Poly mailers provide a lightweight, cost‑effective alternative to traditional cardboard boxes, reducing shipping costs while maintaining product protection. The JinRuiKJ Black Poly Mailers feature a 10x13‑inch interior, 2.4 mil thickness, and a self‑sealing adhesive that remains secure in hot weather. Priced at $16.49 for 100 pieces, they hold a 4.8‑star rating from 1,935 reviews, indicating high customer satisfaction.
For businesses that prefer a lighter aesthetic, the Fuxury White Poly Mailers offer a bright, clean surface that can be easily customized with stickers or printed thank‑you notes. They cost $9.99 for 100 pieces and carry a 4.7‑star rating from 11,615 reviews, reflecting reliable performance. Both options are tear‑resistant, puncture‑resistant, and waterproof, ensuring that the contents arrive in pristine condition.
Select the mailer that best reflects your brand identity; a sleek black envelope conveys luxury, while a crisp white envelope suggests simplicity and purity. Whichever you choose, the self‑sealing strip eliminates the need for additional tape, saving time and reducing material waste.
Step 3: Apply Branded Sealing Tape
Even when a mailer includes a self‑seal, a custom tape adds a professional finishing touch and reinforces brand visibility. The COACO Custom Shipping Tape is water‑activated, creating an instant, strong bond that will not loosen during transit. Priced at $19.75 for a 50‑foot roll, it holds a 4.4‑star rating from 192 reviews, confirming its durability and print quality.
This tape allows you to imprint a logo, slogan, or promotional message directly onto the seal, turning each package into a mobile billboard. The reinforced gummed paper base ensures that the tape adheres firmly to the poly mailer surface, preventing accidental opening. Compared with standard plastic tape, the custom option offers superior branding potential and a more premium tactile feel.
To apply, lightly dampen the adhesive side, press firmly along the seam, and smooth out any air bubbles. The result is a seamless, branded closure that enhances the perceived value of the shipment while protecting the contents.
Step 4: Include Protective Inserts and Personalized Extras
Customers appreciate small details that demonstrate care, such as tissue paper, thank‑you cards, or protective sleeves. The Frosted Zipper Clothing Bags serve as versatile inserts for delicate items, offering a resealable zip that protects against moisture and dust. Priced at $23.99 for 100 bags, they hold a 4.6‑star rating from 1,465 reviews, indicating reliable performance.
These bags are especially useful for apparel or accessories that benefit from a secondary layer of protection. Place the product inside the frosted bag, add a handwritten thank‑you note, and then insert the whole package into the outer poly mailer. The frosted surface adds a subtle elegance while the vent holes prevent suffocation, making the packaging both functional and aesthetically pleasing.
For businesses that ship smaller items such as jewelry or cosmetics, the Spakon Pink Shipping Boxes provide a compact, reusable option. Measuring 6 × 4 × 1.6 inches, these boxes cost $29.99 for 50 pieces and have a 4.4‑star rating from 320 reviews. Their bright pink hue can be coordinated with brand colors, and the easy‑to‑assemble design eliminates the need for additional tools.
Combine these inserts with a concise brand story card to reinforce messaging. The added weight of the inserts is minimal, preserving the cost‑saving benefits of poly mailers while delivering a premium feel.
Step 5: Assemble, Seal, and Present the Package
With all components prepared, follow a consistent assembly routine to ensure efficiency and quality control. Begin by placing the product inside the frosted zipper bag (if used), then add any tissue or promotional material. Slide the assembly into the chosen poly mailer, align the self‑seal, and press firmly to close.
Next, apply a strip of the COACO custom tape across the seam, making sure the printed design faces outward. Finally, affix a small sticker or branded label near the seal to draw the eye and reinforce brand identity. If the order includes multiple items, consider using a Spakon pink box as a secondary container for added protection and visual impact.
Before dispatch, verify that the address label is legible and that the package complies with carrier weight limits. A final quality check reduces the likelihood of returns and enhances the overall customer experience.
Tips & Pro Tips
- Batch print custom tape designs to maintain consistency across large order volumes.
- Use a light gray or pastel interior for poly mailers to contrast with vibrant branding on the exterior.
- Include a QR code on the thank‑you card that links to a video unboxing guide, encouraging social sharing.
- Store poly mailers and tape in a climate‑controlled area to preserve adhesive integrity.
- Test the sealing strength of each product by gently shaking a sample package before full deployment.
Troubleshooting
If the self‑seal on a poly mailer does not adhere properly, ensure the surface is clean and free of dust before sealing. Lightly moistening the adhesive strip with a damp cloth can improve bond strength, especially in low‑humidity environments. Should the custom tape fail to stick, verify that the water activation step was performed evenly; uneven moisture can lead to weak adhesion.
In cases where the frosted zipper bag tears during insertion, consider using a slightly larger mailer to reduce friction, or reinforce the bag edges with a thin strip of clear packing tape. Persistent issues with box assembly may indicate that the cardboard has absorbed moisture; store boxes in a dry location and allow them to acclimate before use.
Conclusion
Creating a memorable branded unboxing experience does not require extravagant spending; strategic selection of affordable, high‑quality tools can deliver comparable impact. By defining a clear brand narrative, choosing appropriate poly mailers, applying custom sealing tape, and adding thoughtful inserts, businesses can elevate the customer journey from the moment the package is received. Consistent execution of these steps builds brand loyalty, encourages organic promotion, and ultimately drives revenue growth.
Implement the techniques outlined in this guide, monitor customer feedback, and refine the process over time. A well‑crafted unboxing experience becomes a silent salesperson, turning satisfied customers into enthusiastic brand ambassadors.
Products Mentioned in This Guide
Frequently Asked Questions
How can I create a branded unboxing experience on a tight budget?
Use affordable poly mailers, custom-printed tape, and simple inserts like thank‑you cards to add brand elements without costly custom boxes.
What are the key packaging items needed for a memorable unboxing?
Essential items include sturdy poly mailers, branded sealing tape, and a small personalized insert such as a note or sticker.
Can I source these packaging supplies from Amazon?
Yes, products like JinRuiKJ Black Poly Mailers and other budget-friendly accessories are readily available on Amazon.
How do personalized inserts boost perceived value?
A handwritten note or branded card creates an emotional connection, making customers feel appreciated and increasing brand loyalty.
Is custom printing necessary for a high‑impact unboxing?
Not always; using branded tape and simple printed stickers can achieve a professional look without full‑scale custom box printing.